PiglixMCMods LogoPiglixMCMods
HomeShadersTexturesModsLow-End ShadersRTX ShadersSavedGuidesAbout
GET IT ONGoogle Play

Popular Collections

📱 Performance HubBest Low-End ShadersMCPE Performance Mods
✨ Realism & RTXRealistic RTX ShadersRTX Texture Packs for MCPE
🤖 Platform CompatibilityMinecraft PE Shaders 1.21Shaders for Android & iOS
⚔️ Gameplay VibeTop PvP Texture PacksMedieval Texture Packs
🤝 Community & SocialsYouTubeInstagram
Get the Android App — Free on Play Store
HomeGuidesAbout UsSponsor & PartnerContactPrivacy PolicyTerms & ConditionsDisclaimer
Minecraft>Textures>Dracion Studios: Animated Textures Core
Dracion Studios: Animated Textures Core logo

Dracion Studios: Animated Textures Core

By👤DracionStudios

A core library that enables creators to use animated textures in entites

Why Dracion Studios: Animated Textures Core is a top-tier texture pack mod for Minecraft 1.21

Developed by the talented creator DracionStudios, Dracion Studios: Animated Textures Core stands out as a highly recommended selection for your Minecraft client. It is fully optimized, compatibility-tested, and brings a major upgrade to the gameplay experience in Minecraft version 1.21.

⚙️ Quick Resource Specs

Mod CreatorDracionStudios
Latest Version1.21
Supported Game VersionsMinecraft 1.21+
File Size3.26 KB
Last UpdatedUpdated: June 14, 2026
Total Downloads366 downloads
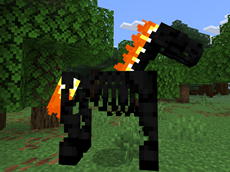
Dracion Studios: Animated Textures Core screenshot active
Discover new possibilities in your world with Dracion Studios: Animated Textures Core, a premium textures project created by DracionStudios. Designed to run smoothly on Minecraft 1.21, this addition brings both quality improvements and immersive elements to your setup.

Welcome to Animated Textures!

This is a core library for fellow creators to be able to use my code that I was able to develop that enables animated textures in entites!

*A moderate level of experience and knowledge in both coding and Blockbench is required to use this*

Now, you can make animated textures for blocks, but this reasource pack fills in the gap for Entites and Attachables.

How to Use the Pack

There are four steps to using the pack in your mods:

  1. Installing
  2. Models
  3. Textures
  4. Coding


Installing

To install the pack, it's pretty easy.

First, download the pack,

Then open the file however you open files on your device,

And there you go! You have completed Step 1!

Models

For my example, I'll use a mod I've been working on the past few days.

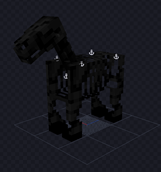
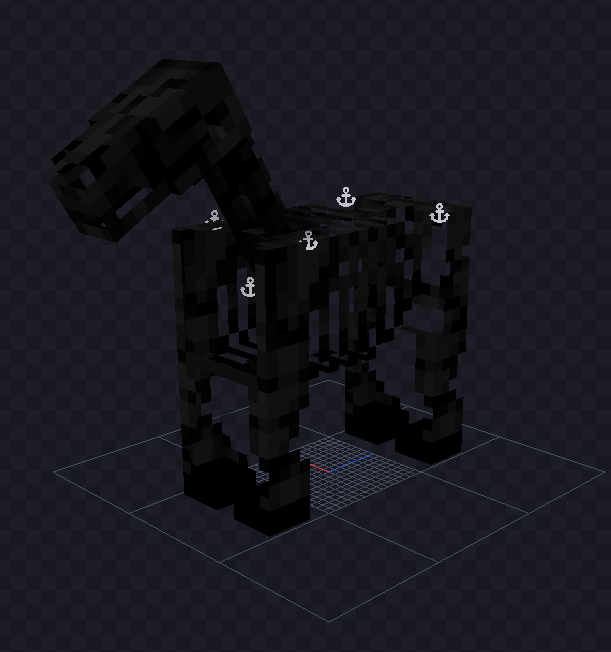
You will need TWO models, the first is your main model, the one the entity or attachable is supposed to be. for me it's this:
And its UV settings look like this:
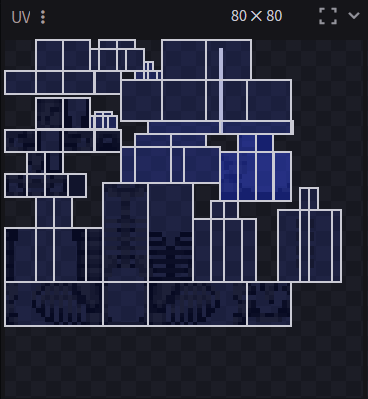
Now, texture size and proportions does not matter (thankfully) but what does matter is how many frames you want to have in your animated texture.

For me, I wanted to have three frames in my animated texture.

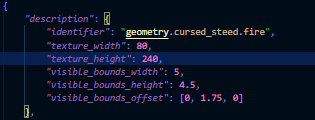
So for your second model, duplicate your first, give it some other name, and then go to your UV number settings, and change the dimensions to: (original width , original hieght X number of frames). Now, if doing this in Blockbench messes up your model, you can instead go into the model file itself and edit the code there, like this:
Now when you go back to Blockbench the model should look the same:

(In mine I have already made the texture)
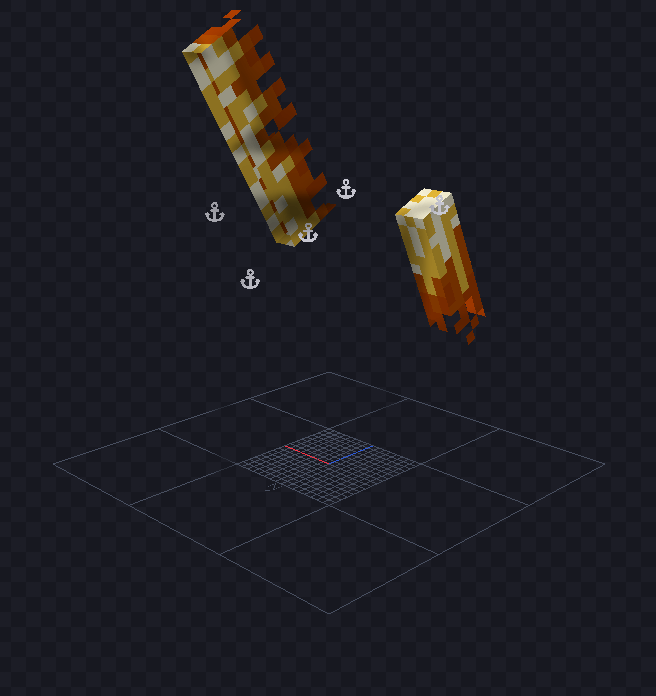
but the UV look like this:
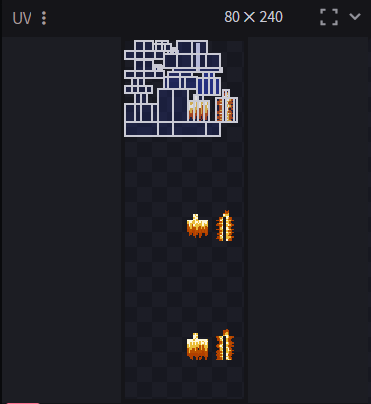
Congrats! You have complete Step 2!

Textures

You will also have TWO textures in order to have an animated creature.

The first texture is your base texture, the NON-Animated texture it should be the one created with your main model, like this:
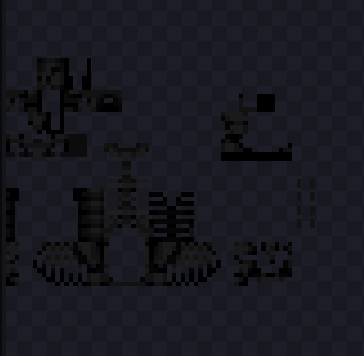
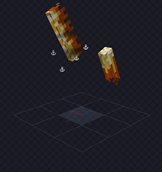
Then you should go to your animated model and create another texture, do it in a way that does not change the UV or shape of the model in any way. Once this is done, import the texture into your main model and it will show up like this:

That little film reel looking symbol means it was made correctly. If it does not show up like that, it means you have the dimensions wrong and must change them. At the bottom of the screen this should appear:

This handy dandy bar lets you move between your second texture's frames. The play button plays the animation, the number is the current frame you are on, and the dial symbol is the FPS setter. Now, paint your texture moving between frames as you like and once done, play it at different speeds to see your favorite. Once that's done, update the texture in the second model so it apears like this in the UV screen where each frame is lined up vertically:
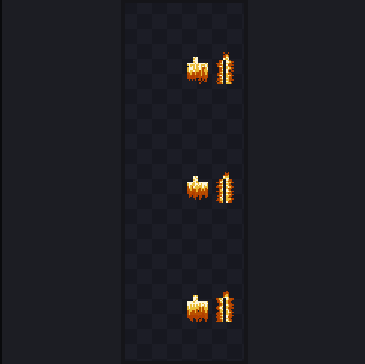
Once that is done, congrats! You have finished Step 3!

Coding

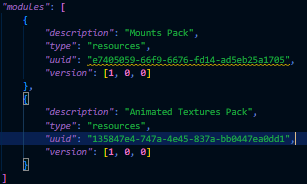
Now onto the most complicated part. First, you're going to want to go into your Mainfest.json and paste this into the Modules section along with anything else there:

*
{
            "description": "Animated Textures Pack",
            "type": "resources",
            "uuid": "135847e4-747a-4e45-837a-bb0447ea0dd1",
            "version": [1, 0, 0]
        }
*
it should look like this:
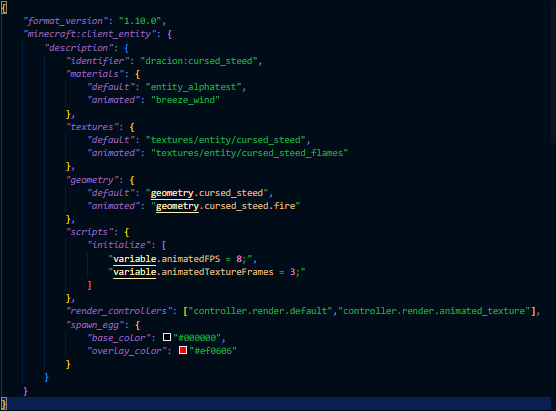
Then you are going to go into your entity's file which should look something like this (or at least have most of the parts except for some things):
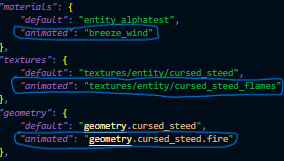
Next you are going to edit the materials, textures, and geometry sections. In the materials section paste in this:
*
"animated": "breeze_wind"
*
In the textures section, add another texture with the name "animated" (name is the word in the quotations before the colon), then change the filepath to the one of your second texture you made with the animation frames.
In the geometry section, add another geometry with the name "animated" (same spot as texture's names) and change the geometry ID to the ID of the second model you made.
The items added in are circled below:


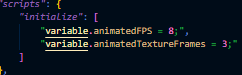
Next, there might be a section called "scripts" on the same level as materials and the others. If not, create one! Inside that section, and a new subsection called "initialize". Instead of using curly braces ( { } ) for this section, use square brackets ( [ ] ) after the colon.

Inside of that section paste these two things:

*

"variable.animatedFPS = x;",

"variable.animatedTextureFrames = y;"

*

Now replace 'x' with the FPS you want the animation to play at, and replace the 'y' with how many frames are in the animated texture.

(note for coders only, if you are not a coder, skip this note:          Start counting from 1 when counting frames, not 0, I wanted this to be able to be used by non-coders).

It should look something like this:

Now in the render controllers section paste in this:

*

, "controller.render.animated_texture"

*

It should look like this:

Congratulations! You have finished Step 4! you should now have an entity or attachable with an animated texture!


I made this system in order to do animated textures with my large project I am currently working on, and thought since I haven't posted anything in a while, and people would get lots of use from this, I should post it!

Put any questions down in the comments and I will answer them when I can!

Thank you for downloading!!!

The Ultimate Guide to Dracion Studios: Animated Textures Core

If you are exploring the vast world of Minecraft modifications, Dracion Studios: Animated Textures Core by DracionStudios is a standout texture that deserves your attention. With over 366 downloads, it has become a staple for players looking to enhance their experience. As the creator describes it, this project is "A core library that enables creators to use animated textures in entites". Whether you are a veteran builder constructing massive cities, or simply a casual player looking to upgrade your survival world, this guide will provide you with all the essential details on how Dracion Studios: Animated Textures Core alters the game.

What Makes It Special?

Unlike standard textures that simply alter superficial elements, Dracion Studios: Animated Textures Core introduces a wide array of visual and mechanical features designed to seamlessly blend into the vanilla aesthetic. DracionStudios has clearly spent significant time refining the project to ensure that every aspect feels polished and responsive for version 1.21.

Installation Guide

Getting Dracion Studios: Animated Textures Core up and running is straightforward. Follow these step-by-step instructions:

  1. Verify Your Version: Ensure your Minecraft launcher is set to version 1.21.
  2. Install Mod Loader (if required): If this is a mod, download the compatible loader (Forge, Fabric, NeoForge).
  3. Download the File: Click the secure download button above to retrieve the official file from CurseForge.
  4. Move the File: Place the downloaded file into your `mods`, `shaderpacks`, or `resourcepacks` folder depending on the texture type.
  5. Launch and Enjoy: Open Minecraft, navigate to the respective settings menu, and activate Dracion Studios: Animated Textures Core.

Compatibility & Performance

Compatibility is robust. Dracion Studios: Animated Textures Core is designed specifically for version 1.21, taking full advantage of the latest engine optimizations. During typical gameplay, this addition maintains a stable frame rate, though lower-end laptops might experience slight stuttering. We recommend pairing this with performance boosters like Sodium or Iris to guarantee a silky-smooth experience.

Details

Downloads:366
Created:2 months ago
Updated:2 months ago
Project ID:1574682
License:All Rights Reserved
Environment:Client

🤝 Join Community for Support

Need help installing this resource or want to see more showcases? Join our community!

Subscribe on YouTubeFollow on Instagram

Dracion Studios: Animated Textures Core

Screenshot 0
Screenshot 1
Screenshot 2
Screenshot 3
Screenshot 4
D
DracionStudios
TEXTURES CREATOR
Downloads366
Version1.21
TypeTEXTURES
File Size3.26 KB

About This textures

A core library that enables creators to use animated textures in entites

Welcome to Animated Textures!

This is a core library for fellow creators to be able to use my code that I was able to develop that enables animated textures in entites!

*A moderate level of experience and knowledge in both coding and Blockbench is required to use this*

Now, you can make animated textures for blocks, but this reasource pack fills in the gap for Entites and Attachables.

How to Use the Pack

There are four steps to using the pack in your mods:

  1. Installing
  2. Models
  3. Textures
  4. Coding


Installing

To install the pack, it's pretty easy.

First, download the pack,

Then open the file however you open files on your device,

And there you go! You have completed Step 1!

Models

For my example, I'll use a mod I've been working on the past few days.

You will need TWO models, the first is your main model, the one the entity or attachable is supposed to be. for me it's this:

And its UV settings look like this:

Now, texture size and proportions does not matter (thankfully) but what does matter is how many frames you want to have in your animated texture.

For me, I wanted to have three frames in my animated texture.

So for your second model, duplicate your first, give it some other name, and then go to your UV number settings, and change the dimensions to: (original width , original hieght X number of frames). Now, if doing this in Blockbench messes up your model, you can instead go into the model file itself and edit the code there, like this:

Now when you go back to Blockbench the model should look the same:

(In mine I have already made the texture)

but the UV look like this:

Congrats! You have complete Step 2!

Textures

You will also have TWO textures in order to have an animated creature.

The first texture is your base texture, the NON-Animated texture it should be the one created with your main model, like this:

Then you should go to your animated model and create another texture, do it in a way that does not change the UV or shape of the model in any way. Once this is done, import the texture into your main model and it will show up like this:

That little film reel looking symbol means it was made correctly. If it does not show up like that, it means you have the dimensions wrong and must change them. At the bottom of the screen this should appear:

This handy dandy bar lets you move between your second texture's frames. The play button plays the animation, the number is the current frame you are on, and the dial symbol is the FPS setter. Now, paint your texture moving between frames as you like and once done, play it at different speeds to see your favorite. Once that's done, update the texture in the second model so it apears like this in the UV screen where each frame is lined up vertically:

Once that is done, congrats! You have finished Step 3!

Coding

Now onto the most complicated part. First, you're going to want to go into your Mainfest.json and paste this into the Modules section along with anything else there:

*
{
            "description": "Animated Textures Pack",
            "type": "resources",
            "uuid": "135847e4-747a-4e45-837a-bb0447ea0dd1",
            "version": [1, 0, 0]
        }
*
it should look like this:
Then you are going to go into your entity's file which should look something like this (or at least have most of the parts except for some things):
Next you are going to edit the materials, textures, and geometry sections. In the materials section paste in this:
*
"animated": "breeze_wind"
*
In the textures section, add another texture with the name "animated" (name is the word in the quotations before the colon), then change the filepath to the one of your second texture you made with the animation frames.
In the geometry section, add another geometry with the name "animated" (same spot as texture's names) and change the geometry ID to the ID of the second model you made.
The items added in are circled below:


Next, there might be a section called "scripts" on the same level as materials and the others. If not, create one! Inside that section, and a new subsection called "initialize". Instead of using curly braces ( { } ) for this section, use square brackets ( [ ] ) after the colon.

Inside of that section paste these two things:

*

"variable.animatedFPS = x;",

"variable.animatedTextureFrames = y;"

*

Now replace 'x' with the FPS you want the animation to play at, and replace the 'y' with how many frames are in the animated texture.

(note for coders only, if you are not a coder, skip this note:          Start counting from 1 when counting frames, not 0, I wanted this to be able to be used by non-coders).

It should look something like this:
Now in the render controllers section paste in this:

*

, "controller.render.animated_texture"

*

It should look like this:

Congratulations! You have finished Step 4! you should now have an entity or attachable with an animated texture!


I made this system in order to do animated textures with my large project I am currently working on, and thought since I haven't posted anything in a while, and people would get lots of use from this, I should post it!

Put any questions down in the comments and I will answer them when I can!

Thank you for downloading!!!

📌Supported Minecraft Versions: Minecraft 1.21+

How to Install

1. Download the resource pack .zip file. 2. Open Minecraft and go to Options > Resource Packs. 3. Drag and drop the downloaded file into the list and activate it.